1
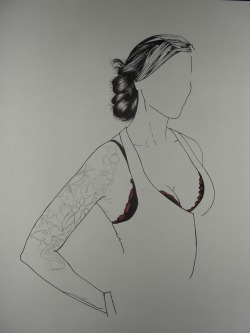
Alright, I start off very lightly sketching the figure. I don't want to go with dark lines, because I'll erase all pencils lines eventually anyway. I do it so lightly that they didn't show up in a picture. Once I'm happy with proportion, I start defining it more and more and go a little heavier with the pencil. Once that's done, it's a matter of starting the inking process. Nice and smooth is the way to go.
2
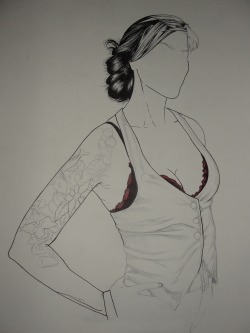
Once the main outline is done, I start erasing some pencil lines. I also laid down the basic dark ares in the vest with a pencil.
3
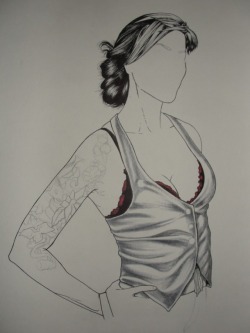
By now, all the detail work in the hair is done. I also darken the vest with a grey marker. These are just a base for more color later, no since trying to overkill it here.
4

Most noticable thing here is the mostly done vest, gone over with a watered down black ink or black acrylic paint. Paint is a little easier to work with, but tends to take more water, which can warp the illustration board. I've also colored the hair, and have started some other small details.
4a
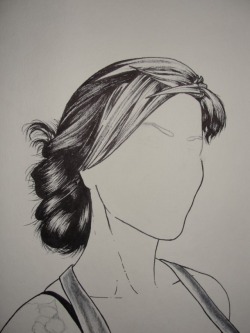
A close up study of the hair detail. Completely shaded and detailed with Sakura Pigma Pens, usually a size .01,1,5 and maybe an 8 for solid areas.
4b
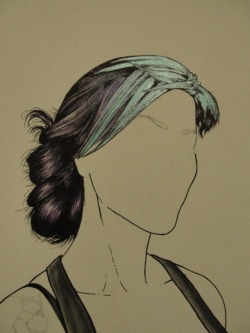
Color! Purple and turqouise metallic ink. After it dries, I go back over it with the pens and add back some of the details. Turned out cool I think.
5
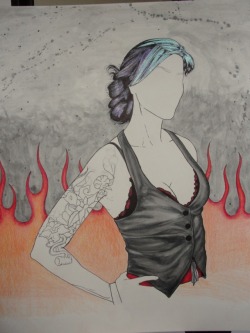
Added some back ground. I thought flames would look cool. The grey background is just to keep it from being stark white and boring. Plus a colored background usually helps pop the figure out a little more.
6
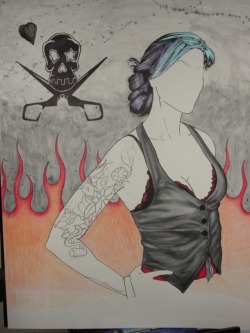
I felt it needed a little something to offset the balance. The figure is mostly off to one side, so I needed to add some weight to the other side. Purely a visual "gut" feeling kinda thing. Decided to go with the salon's logo.
7
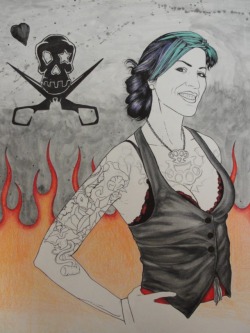
Ok, happy with the background and balance and all that stuff. Now the face. Always a scary part of any portrait. It's either going to look like the person, or it's not. Sketched with pencil a couple of times, and after much hesitation, finally done in ink. Once the ink is laid down, there's no going back. Also started detailing the tattoo. I used a photo that was pretty small, so alot of detail had to be made up. It was a suprise for her, so I couldn't really ask for detailed photos.
8
At first, this was going to be black & white, then I decided it would be much better in color. at this point, it was just a matter of coloring. Used colored pencils btw.
9
Same as above really. Just keep adding small details. Constantly standing back a few feet and seeing what colors need to be darkened and such. The whole time I'm trying to decide what to do with the skin color....?
10
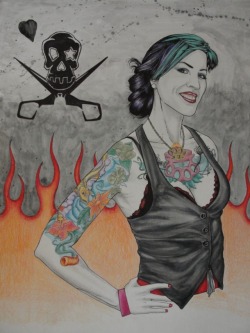
Decided to do a grey tone shading thing with the skin. Makes the color of the tats stand out better too. Then...
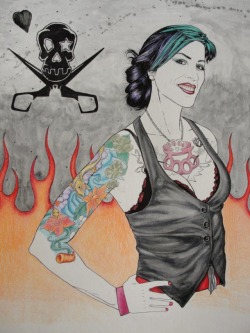
TADA!!! One portrait done. :-)
This is Estrella, owner of Velvet Monkey Salons here in Okla. btw.
She owns it now, and I last saw it hanging in her salon.
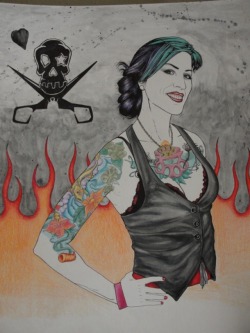
TADA!!! One portrait done. :-)
This is Estrella, owner of Velvet Monkey Salons here in Okla. btw.
She owns it now, and I last saw it hanging in her salon.
